The translations you create in Adapt It Mobile are organized into Projects. Projects contain some basic information about the languages you are working in. Projects also keep track of the documents you are adapting.
Creating a new project
To create a new project, complete the following steps:
-
Open Adapt It Mobile on your device.
-
On the Welcome screen, tap the Continue button.
-
On the Get Started screen, tap the Create Project button:

This will start the Create Project wizard, which will guide you through the following steps:
Step 1: Source Language
-
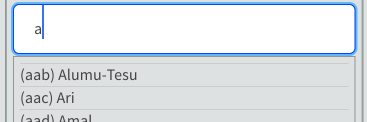
Enter the name of the source language in the Source Language Name field. If you are unsure of the spelling, type in a few letters of the name and tap on the correct entry in the list of suggestions that appears:
-
If this language is a dialect, type in the name of the dialect:

-
If the language reads right-to-left, select the Language reads right-to-left checkbox:

-
tap the Next button to continue.
Step 2: Target Language
-
Enter the name of the target language in the Target Language Name field. If you are unsure of the spelling, type in a few letters of the name and tap on the correct entry in the list of suggestions that appears.
-
If this language is a dialect, type in the name of the dialect.
-
If the language reads right-to-left, select the Language reads right-to-left checkbox.
-
tap the Next button to continue.
Step 3: Fonts
Some languages need a specific font in order to display properly on the screen. Adapt It Mobile uses Source Sans Pro by default for the source, target and navigation font. This font covers Cyrillic, Cyrillic Extended, Greek, Latin Extended, Polytonic, and Vietnamese languages. If you know that your source or target font will not display correctly – or if you would like to change the font size or color, perform the following steps:
-
tap on the Source Font, Target Font, or Navigation Font lines in the list. This brings up the Font Selection window:
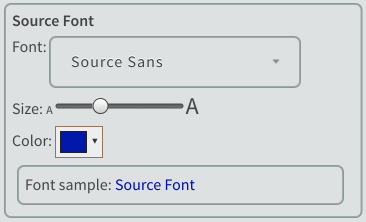
- tap on the Font drop-down list and select the appropriate font from the list. Note that these are the fonts that are installed on your mobile device – if you don’t see the font you need in the list, close Adapt It Mobile and verify that the font is indeed installed on your device.
- Drag the Size slider to the desired size of text.
- tap on the Color drop-down and select the desired text color from the palette.
- tap on the OK button to accept the changes, or the Cancel button to go back to the original font.
When finished on the Font step, tap Next to continue.
Step 4: Punctuation
-
Select the Automatically copy punctuation checkbox if you would like Adapt It Mobile to copy punctuation from the source to the target language.

- If you select the Automatically copy punctuation checkbox, you will need to specify what characters are considered punctuation in the source language, and what the equivalent punctuation character is in the target language. A default set of source and target “pairs” is provided for you. You can remove punctuation that doesn’t apply in your source/target languages by tapping on the minus (-) sign button. You can also add punctuation by typing in the last (empty) row.
- tap the Next button to continue to the next step.
Step 5: Cases
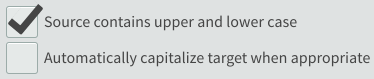
- Select the Source contains upper / lower case checkbox if the source languages contains both lower and upper case characters.
-
If you would like Adapt It Mobile to automatically capitalize the target text, select the Automatically capitalize target when appropriate checkbox:
- If you do select the Automatically capitalize target when appropriate checkbox, you will need to specify the lower and upper case characters in the source language, and the corresponding lower/uppercase characters in the target language. A default set of source and target lower/uppercase equivalencies is provided for you. You can remove a character that doesn’t apply in your source/target languages by tapping on the minus (-) sign button. You can also add a lower/uppercase character by typing in the last (empty) row.
- tap the Next button to continue to the next step.
Automatic Capitalization Note: Both Android and iOS have system settings that control the capitalization of text input. If you are having problems with the on-screen keyboard automatically capitalizing each word of text, you can turn this feature off for your mobile device:
- On an Android device, go to Settings / Language & Input / Keyboard & input methods; you will need to open the preferences of your selected keyboard and check for a preference labeled “auto capitalization”
- on an iOS device, go to Settings / General / Keyboard and select “Auto-Capitalization”
Step 6: USFM filtering
If you are importing .usfm document files from Paratext or Bibledit, you can filter out what kind of markers are displayed on the screen when you are adapting. In most cases, you will not need to use a custom USFM filter set.
-
If you want to use a custom filter set, select the Use custom USFM filter set checkbox:

- If you do select the Use custom USFM filter set checkbox, you will need to specify which USFM markers to display. A default set of markers is specified for you; you can select and unselect the various markers as appropriate for your translation.
- tap the Finish button to complete the Create Project wizard. Adapt It Mobile will close the wizard and display the main screen.
Copying a project
If you have already created an adaptation project in Adapt It desktop with the same source and target languages you will be using for your adaptation, you can copy / import the project file from your computer to your mobile device and use it in Adapt It Mobile. The project file is named AI-ProjectConfiguration.aic and will be located under the directory:
Adapt It Unicode Work / <project name> / AI-ProjectConfiguration.aic
You can copy this file to the mobile device, or to a cloud service–such as Google Drive or iCloud–that your phone can access.
NOTE: if you don’t have an existing project file from Adapt It desktop, you can create one within Adapt It Mobile. Refer to these instructions for more information.
Important: only project files created using the Unicode version of Adapt It desktop are compatible with Adapt It Mobile.
Complete the following steps to copy a project file into Adapt It Mobile:
- Open Adapt It Mobile.
- On the Welcome screen, tap the Continue button.
-
On the Get Started screen, tap the Copy project icon:

- Navigate to and select the project file (
AI-ProjectConfiguration.aic) from the chooser dialog. Adapt It Mobile will attempt to import the file. - tap the OK button to return to the main window.
Viewing and editing a project’s settings
Complete the following steps to view or edit a project’s settings:
- Open Adapt It Mobile.
- On the main screen, tap the Project Settings button. The project settings screen displays, giving an overview of the current project’s settings.
- To view or edit a specific setting, tap on that setting in the list. An editor will display the current settings. You can make changes here to the selected setting.
- tap the OK button to accept changes made to the current screen and return to the general settings.
- tap the Cancel button to discard any changes made to the current screen and return to the general settings.
When you are done viewing or modifying the settings for the project, tap on the Left arrow button in the upper left corner of the title bar to return to the main screen.